User guide
The App3DShot manual
Every panel, tool and export option across the three studios — the screenshot editor, the 2D video maker and the 3D animation studio. Written to be skimmed: find the panel you're looking at, read the four lines about it, get back to work.
From nothing to a store-ready set
- 1
Pick your tool
Still screenshots go in the Screenshot Editor. A moving App Preview goes in the 2D Video Maker, or the 3D Studio for a camera shot.
Open → - 2
Start from a template
Open the Templates panel and apply a ready-made set. It's faster than a blank canvas and the layout is already store-legal.
Open → - 3
Drop in your screens
Add a device mockup, then upload your screenshot — it lands inside the device's screen. Rewrite the caption to match the feature.
Open → - 4
Export every size
Smart Export renders one ZIP with every store size. Videos export as H.264 MP4 ready for App Store Connect.
Open →
Tool reference
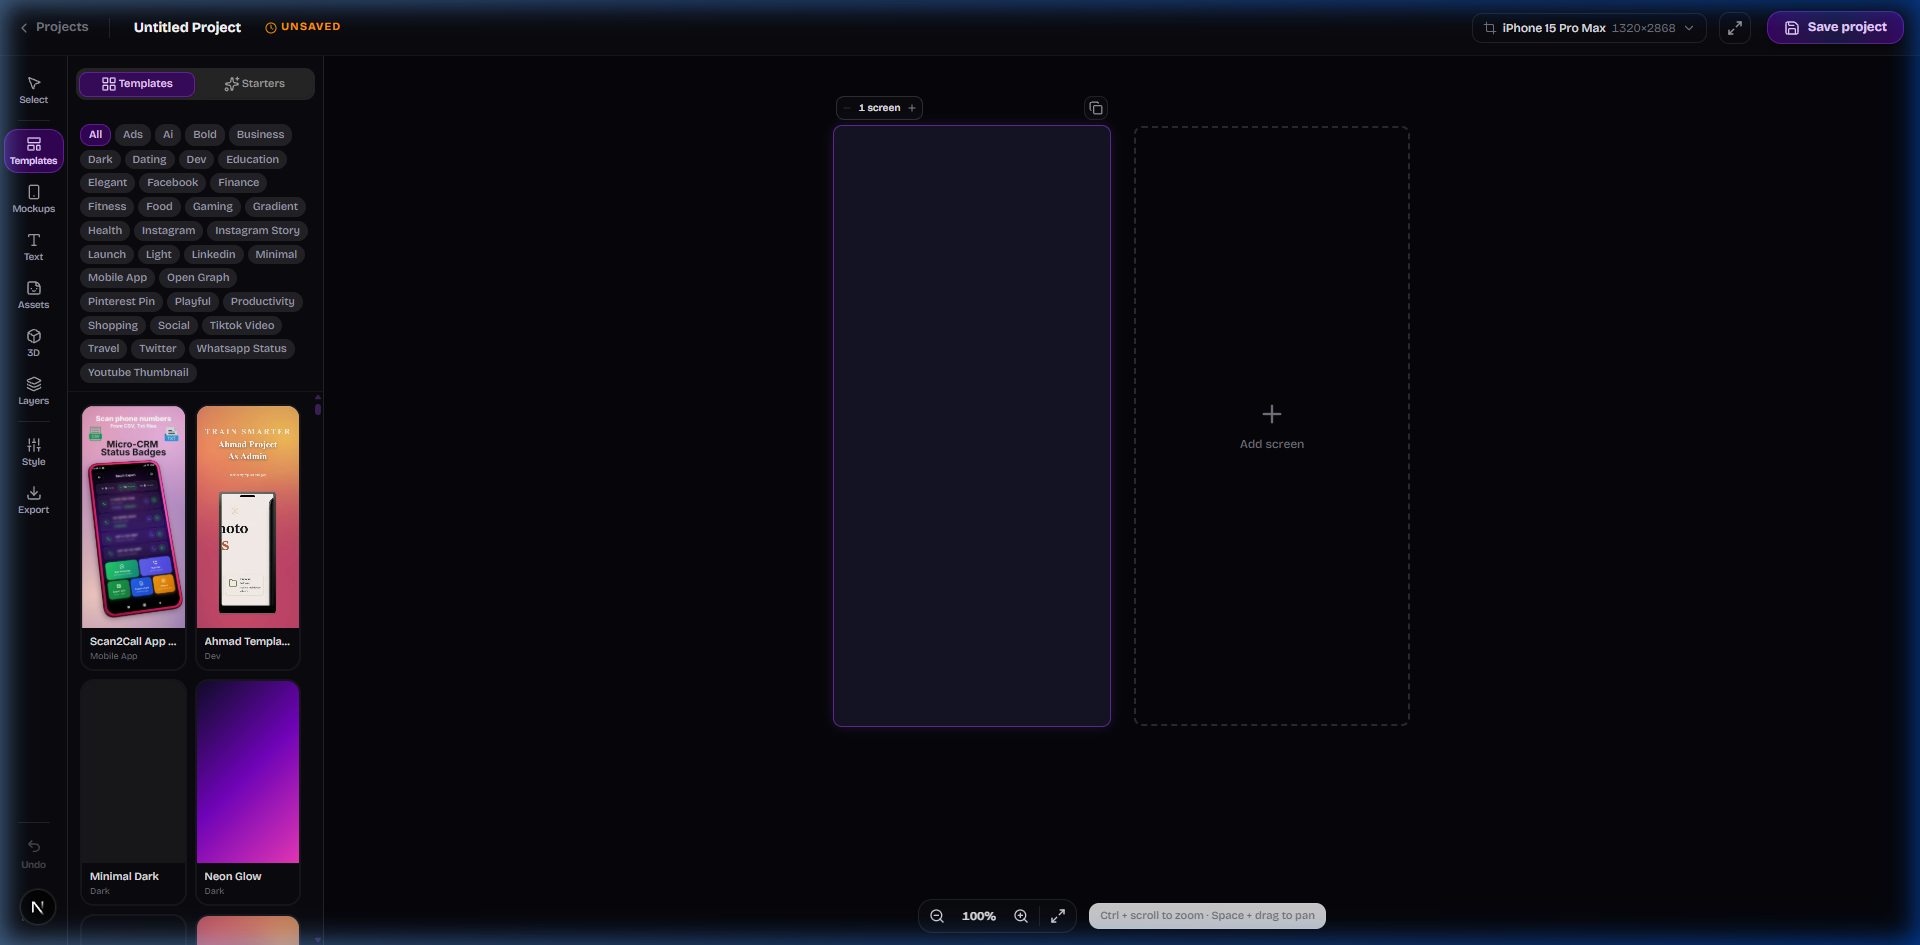
Screenshot Editor
A multi-slide canvas for App Store and Play Store screenshot sets. Build every screen side by side, then export all the sizes each store asks for in one pass.
Open Screenshot EditorPanels & features
Everything lives in one screen: a tool rail on the left, your slides in the middle, and whichever panel you opened flying out between them.
- Tool rail: Select, Templates, Mockups, Text, Assets, 3D mockup, Layers, Style and Export — click an icon to fly its panel out, click again to collapse it and get the canvas back.
- Slide strip: Every slide in the set renders live, side by side. Click one to make it the editable canvas; use the strip's buttons to add, duplicate, reorder or delete.
- Undo / redo: At the bottom of the rail, and on Ctrl/⌘+Z and Ctrl/⌘+Shift+Z. Every canvas change is a history step.
- Full screen: Hides the rail and panels so the slides get the whole window. Esc brings them back.
Press Ctrl/⌘+K anywhere in the editor to open the command palette and jump straight to a panel or action.
Common questions
Do I need an account to use App3DShot?
No. The screenshot editor, video maker and 3D studio are all fully usable signed out — your work stays in your own browser. An account is only needed at the moment you export or save, so nothing is uploaded to us before that.
Which tool should I use for App Store screenshots?
The Screenshot Editor. It builds a multi-slide set on one canvas and its Smart Export produces a single ZIP containing every iPhone, iPad and Android size, foldered per store.
How do I make an App Store preview video?
Use the 2D Video Maker for storyboard-style animation of your screens, or the 3D Animation Studio for a camera-driven shot of a real 3D device model. Both export H.264 MP4 that App Store Connect accepts.
Does exporting upload my screenshots to a server?
No. Every export — PNG, ZIP, MP4 and GIF — is rendered in your browser and downloads straight to your machine. Nothing is sent anywhere to be processed.
Can I reuse a design across several apps?
Yes. Save the design as a template, then apply it from the Templates panel in any new project and swap in the new screenshots and copy.
What screenshot sizes does the App Store require?
At minimum a 6.7-inch iPhone set; iPad sizes are required if your app supports iPad. Smart Export in the editor selects the current required sizes for you and renders each one from the same design.
Ready to build?
Nothing to install, no signup to start. Open a studio and the first screenshot is a few minutes away.